 cohdltd@telus.net
 Monday - Friday: 8:00 AM to 7:00 PM
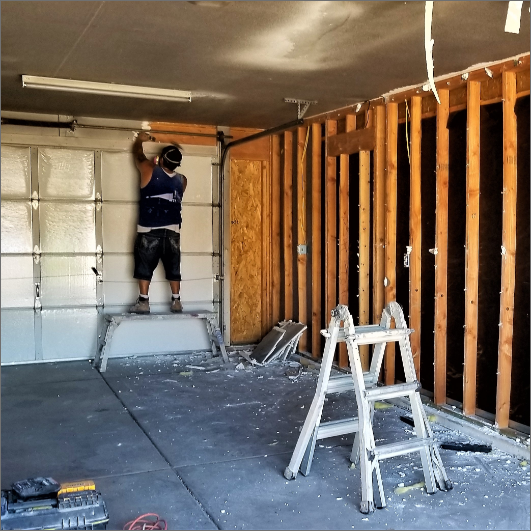
During your routine cleanups, there is one place that always needs maintenance work, and that’s your garage. However, many people tend to miss the maintenance that your garage door requires. This is something that you should include in your home safety checks. When you overlook this, a lot of stress can be placed on your door opener. Since garage doors have so many moving parts, it isn’t something that you just set and forget after installation.
Performing routine garage door maintenance will help you get longevity out of your garage door, and we are here to tell you how often and what you need to do to keep your garage door in working order.
How Often Should I Perform Routine Maintenance On My Garage Door?
It’s best to service your garage door twice a year. This routine maintenance will keep your garage door in working order and prevent larger issues from occurring. So it’s best if you can spot and fix the small repairs ahead of time.
When Should I Perform My Garage Door Maintenance?
The most optimal time to do your routine maintenance is in the fall and spring. It’s good to check on things before winter approaches, especially in snowy climates like Calgary. You’ll want to ensure you won’t be having to make big repairs in the cold or have to leave your car outside for days on end because your overhead door won’t open. It is also good to check in on the door after winter’s end when the temperature and moisture levels change. The cold weather can cause certain aspects of the door to wear out quicker.
What To Look For?
It’s best to start your routine garage door maintenance with a quick inspection. Start by clearing the area and making sure there is adequate light getting into your garage. Take a quick peek at all the parts and then operate the door as usual. Make sure you watch and listen carefully as it goes up and down. Often automatic garage doors can start wiggling and making scraping sounds if something needs to be tuned. This will help indicate if a few bolts need tightening or you need to call in the professionals for a bigger fix. If you can hear something, start by taking a closer look at the tracks, springs and cables and go from there. Otherwise, start your maintenance as usual.
Where To Start
It’s best to look at your garage door with an order of operations in mind. Since many of these parts rely on each other it’s good to have an excellent checklist to work off of.
Clearing The Tracks
Inspect the overhead door tracks on both sides. Ensure that they are free and clear from debris, dirt and rust. If you notice a lot of rust on the tracks, clean it with an acidic cleaner such as vinegar, lemon and salt, or hydrogen peroxide. Too much dirt and rust build-up can jam the rollers causing other major problems to occur. Once the tracks are clear, you can even take out your level to guarantee they are flush with their vertical segments. If small adjustments need to be made to level them out, do so, but if they are very crooked, it’s best to call our expert team at A1 Doors to come and take a look.

Tightening The Hardware
Next, you’ll want to go around checking for any loose nuts and bolts. Go along the brackets that hold the door’s tracks to the wall and ceiling and tighten up the screws. Since the garage door goes up and down countless times a year, the vibration and constant motion will be sure to loosen the hardware even a little. So, it’s beneficial to check and adjust the fasteners that anchor the garage door opener to its framing. This will ensure it is tightly secured and won’t fall down.
Roller Inspection & Replacement
You will want to take a good close look at the rollers along the edge of the garage door. Make sure to inspect them during your routine maintenance and typically replace them every five to eight years. You will want to look for any chips or cracks on the rollers, and if you find any, you will have to replace them. The replacement of rollers is quite simple. Start by removing the brackets that hold them to the door. However, be cautious of not removing the bottom bracket on each side of the door. These brackets are attached to the lift cables, which are under extreme tension, and you could get seriously injured.
Balancing
Most of the time, the tension springs just need to be balanced. But if the springs wear out enough, they can snap, putting an uneven weight distribution on the door. In turn, leaving your door hanging lop-sided, midair. Plus, it exerts more tension on the cables. Causing the cables to wear out, which could cause the garage door to come crashing down. To figure out if you need a spring adjustment, pull the emergency release cord to disconnect the trolley from the rail. Then manually raise the door to about waist level. If the door slides down or starts going up on its own, it will indicate that the springs need adjusting.
It is best to get a professional technician for repairs this big, but if you’re up for the task, check our guide for garage door cable and spring repairs to help you resolve the issue.
Checking The Cables and Springs

If the door is balanced it’s still vital to check the cables and springs that lift the door open and closed. If you repair the springs and cables yourself, be careful as they are under extreme tension and wear more easily. The cables attach to the bottom roller brackets on the door. They connect the springs and the door to help safely raise and lower it. The torsion or extension springs do the heavy lifting, so it is essential that they are in good working order, or accidents could occur.
Lubricate
Lubricating your garage door’s moving parts are necessary to keep your garage door in working order. It will ensure your garage door will operate quietly, getting rid of any squeaks and scrapping. Plus, it will help it run efficiently when raising and lowering the door. Overall, putting less stress on the mechanics of it.
Lubricate all the metal and moving parts, which includes the hinges and rollers. Spray on the grease and wipe off the excess to make sure it won’t attract dust and dirt. It’s also best to avoid spraying the chain and track. It can attract dust and dirt and gunk up, making it stiffer. The best grease to use that will not attract too much dirt or dry out and harden in colder weather is a lithium-based grease; it works best for moving parts under these conditions.
Test The Sensors
It’s also a good idea to make sure the auto-reverse or sensors on your garage door are working. These sensors provide a safety feature. If something is in the way of the door, it won’t close and will auto-reverse back up, saving you or your car from potential disaster.
Photoelectric System
To check the photoelectric system feature, wave an object that won’t get damaged, such as a towel in the sensor’s way. Start the door to lower and it should sense the towel and reverse back up.
Pressure Sensor
You can also check the door’s mechanical feature by placing a two-by-four on the ground in the door’s path. When the door touches it, it will sense something is in the way. This will cause the door to again auto-reverse back open.
If these features break, call your garage technician to come in and replace them. This safety feature is mandated now in new homes and should be up to code.
Checking The External Controls
If your garage door still isn’t responding even after you’ve checked over the rest of the mechanisms and the power source is connected, it may time to review the external controls.
Check the keypad, remote and wall switch to see if one isn’t working, but the others are. In this case, you will just have to replace the one that isn’t responding. If it’s the remote, it usually only needs a battery replacement. If one of the controls has an antenna, ensure that it is in range or isn’t damaged. However, if it still isn’t responding, you may want to reset the remote or keypad. You can usually find instructions for resetting these controls in the owner’s manual. Or look online for the brand of garage door opener you have installed.

New Controls
As a last resort, if you have gone through and troubleshot all of these issues and it still isn’t working, call in your experienced garage door technician at A1 Doors to diagnose the situation. They can rewire a new wall switch or install an entirely new garage door opener for you, relieving you of these issues.
Replace Weather Stripping & Garage Door Seals
It’s important to also check things like the weather stripping around the bottom and sometimes the garage door’s sides. If you notice any cracks or tears, it’s time to replace it. The weatherstripping keeps cold air along with dust and pests from getting into your garage and, if it’s an attached garage, from getting into your home.
Clean & Spruce Up

If it’s nice out clean the door and give it a fresh coat of paint if necessary. You want the door to look as good as the home it’s in. There’s no point in doing all this work to fix and maintain the working parts if the door isn’t looking fresh.
I keep listening to the news update lecture about getting boundless online grant applications so I have been looking around for the top site to get one Could you tell me please, where could i get some?
WONDERFUL Post.thanks for share..extra wait .. …
An impressive share, I just given this onto a colleague who was doing a little analysis on this. And he in fact bought me breakfast because I found it for him.. smile. So let me reword that: Thnx for the treat! But yeah Thnkx for spending the time to discuss this, I feel strongly about it and love reading more on this topic. If possible, as you become expertise, would you mind updating your blog with more details? It is highly helpful for me. Big thumb up for this blog post!
My partner and I stumbled over here by a different page and thought I may as well check things out. I like what I see so i am just following you. Look forward to finding out about your web page yet again.
Hi! I’ve been reading your website for a while now and finally got the courage to go ahead and give you a shout out from Atascocita Texas! Just wanted to say keep up the fantastic job!
I’d have to examine with you here. Which is not one thing I usually do! I take pleasure in reading a post that may make folks think. Additionally, thanks for permitting me to comment!
Hello, you used to write great, but the last several posts have been kinda boring?K I miss your great writings. Past few posts are just a bit out of track! come on!
Thank you for sharing excellent informations. Your website is so cool. I’m impressed by the details that you have on this website. It reveals how nicely you understand this subject. Bookmarked this website page, will come back for extra articles. You, my friend, ROCK! I found simply the information I already searched all over the place and just couldn’t come across. What a great web-site.
I have been absent for a while, but now I remember why I used to love this blog. Thank you, I’ll try and check back more frequently. How frequently you update your site?
Hello there, I found your website by the use of Google at
the same time as searching for a comparable topic, your website came up, it seems to be good.
I have bookmarked it in my google bookmarks.
Hello there, simply became aware of your blog through Google, and found that it’s
really informative. I’m going to be careful for brussels.
I will be grateful should you proceed this in future. Many other people might be benefited from
your writing. Cheers!
I will immediately snatch your rss as I can’t to find your email subscription hyperlink or newsletter service.
Do you’ve any? Please permit me understand in order that
I may just subscribe. Thanks.
Fantastic post but I was wondering if you could write a litte more on this
topic? I’d be very thankful if you could elaborate a little bit more.
Kudos!
Nice blog right here! Additionally your web site quite a bit up fast!
What web host are you using? Can I get your affiliate link on your host?
I desire my site loaded up as quickly as yours lol
I am extremely impressed with your writing skills as well as with the layout on your
blog. Is this a paid theme or did you modify it yourself?
Either way keep up the nice quality writing, it’s rare to see a great blog like this one today.
I used to be suggested this blog through my cousin. I’m
no longer certain whether or not this publish is written by way of him as nobody else recognize such specified about my problem.
You’re incredible! Thanks!
Every weekend i used to go to see this site, as
i want enjoyment, as this this site conations genuinely good funny
data too.
Today, I went to the beachfront with my children. I found a sea shell and gave
it to my 4 year old daughter and said “You can hear the ocean if you put this to your ear.” She placed the shell to
her ear and screamed. There was a hermit crab inside and it pinched her ear.
She never wants to go back! LoL I know this is entirely off topic but I had to
tell someone!
I’m really enjoying the design and layout of your site.
It’s a very easy on the eyes which makes it much more enjoyable for me to come here and visit more often. Did you hire out a designer to create
your theme? Superb work!
Good day! I could have sworn I’ve been to this site before but after browsing through some of the post I realized it’s new to me.
Anyhow, I’m definitely happy I found it and I’ll be
book-marking and checking back often!
I’m really enjoying the design and layout of your site.
It’s a very easy on the eyes which makes it much more enjoyable for me
to come here and visit more often. Did you hire out a designer to create your theme?
Fantastic work!
I’m not that much of a online reader to
be honest but your sites really nice, keep it up! I’ll go ahead and
bookmark your website to come back down the road. All the best
Hi, I do believe your website could be having internet browser
compatibility issues. When I look at your blog in Safari, it looks fine but when opening
in Internet Explorer, it has some overlapping issues.
I just wanted to provide you with a quick heads up! Other than that,
wonderful site!
I’d like to find out more? I’d want to find out some
additional information.
Admiring the hard work you put into your blog and in depth information you provide.
It’s awesome to come across a blog every once in a while that
isn’t the same outdated rehashed information. Fantastic read!
I’ve bookmarked your site and I’m including your
RSS feeds to my Google account.
Hello! I understand this is somewhat off-topic but I needed to ask.
Does running a well-established website like yours require a massive amount work?
I’m brand new to running a blog however I do write in my diary on a daily basis.
I’d like to start a blog so I can easily
share my personal experience and views online. Please
let me know if you have any suggestions or tips for new aspiring bloggers.
Appreciate it!
Very soon this web site will be famous among all blogging people, due to
it’s fastidious content
I really like looking through an article that will make men and
women think. Also, thanks for allowing me to comment!
Hi my family member! I wish to say that this post is amazing, nice written and come
with approximately all significant infos. I’d like to see more posts like
this .
Howdy! This post could not be written any better!
Reading this post reminds me of my previous room mate!
He always kept chatting about this. I will forward this article to him.
Pretty sure he will have a good read. Thanks for sharing!
WOW just what I was looking for. Came here by searching for situs kvtoto
What’s up everybody, here every one is sharing these familiarity, therefore it’s fastidious to read this website, and I
used to pay a visit this website every day.
Hello my loved one! I wish to say that this post is awesome, nice written and include approximately all significant infos.
I would like to look more posts like this .
I’m gone to inform my little brother, that he should also
pay a quick visit this webpage on regular basis to get updated from latest gossip.
Excellent blog here! Also your web site loads up very fast!
What host are you using? Can I get your affiliate link to
your host? I wish my web site loaded up as
fast as yours lol
Unquestionably believe that which you said. Your favorite reason appeared to be on the internet the simplest thing to be aware of.
I say to you, I definitely get irked while people think about
worries that they plainly don’t know about. You managed to hit the nail upon the top as well as defined
out the whole thing without having side-effects , people could take a signal.
Will probably be back to get more. Thanks
Hi there would you mind letting me know which webhost you’re
working with? I’ve loaded your blog in 3 different browsers and I must
say this blog loads a lot faster then most.
Can you recommend a good hosting provider at a fair price?
Many thanks, I appreciate it!
Hello there! This is kind of off topic but I need some advice from an established
blog. Is it tough to set up your own blog? I’m not very techincal but I can figure things
out pretty fast. I’m thinking about setting up my own but I’m not sure where to begin. Do you have any ideas or suggestions?
With thanks
What’s up to every single one, it’s genuinely a fastidious for me to visit this web page, it
contains valuable Information.
Normally I do not read post on blogs, however I wish to say that
this write-up very forced me to take a look at and
do it! Your writing style has been surprised me.
Thanks, very great article.
I am really impressed together with your writing skills as neatly as with the
layout for your blog. Is that this a paid subject matter or did you customize it yourself?
Anyway stay up the nice quality writing, it is uncommon to see a nice
weblog like this one today..
Awesome post.
We’re a gaggle of volunteers and opening a brand new scheme in our
community. Your website provided us with useful information to work on. You’ve
performed an impressive activity and our entire community might be thankful to you.
Good day! This post could not be written any better! Reading through this post reminds me of my previous room mate!
He always kept talking about this. I will forward this
page to him. Fairly certain he will have a good read.
Thanks for sharing!
Very good write-up. I certainly love this website.
Keep writing!
I like it whenever people get together and share thoughts.
Great website, keep it up!
I have read so many articles on the topic of the blogger
lovers except this article is actually a good
article, keep it up.
Hi there! Do you use Twitter? I’d like to follow you if that
would be okay. I’m undoubtedly enjoying your blog and look forward to new updates.
This post provides clear idea in favor of the new people of blogging, that actually how to do blogging.
Amazing blog! Is your theme custom made or did you download it from somewhere?
A design like yours with a few simple tweeks
would really make my blog stand out. Please let me know where you got
your theme. Cheers
Ahaa, its pleasant discussion on the topic of this post at this place at this blog,
I have read all that, so now me also commenting here.
Excellent post. I was checking constantly this blog and I am impressed!
Extremely useful info specially the last part 🙂 I care for such information much.
I was looking for this certain info for a long time. Thank you and best of luck.
Hi there, i read your blog from time to time and i own a similar
one and i was just wondering if you get a lot of spam feedback?
If so how do you stop it, any plugin or anything you
can advise? I get so much lately it’s driving me insane so any
help is very much appreciated.
Thanks for sharing your thoughts. I really appreciate your efforts and I will be
waiting for your further write ups thank you once again.
If you wish for to improve your familiarity simply keep visiting this website and be updated
with the latest information posted here.
Thanks for finally talking about > Follow Our Garage Door
Routine Maintenance Tips < Liked it!
Hi! I’ve been reading your blog for a long time now and
finally got the courage to go ahead and give you a
shout out from New Caney Texas! Just wanted to tell you keep up the great work!
always i used to read smaller articles that as well
clear their motive, and that is also happening with this piece of writing which I am reading here.
Nice respond in return of this question with firm arguments and describing
the whole thing about that.
Great blog you’ve got here.. It’s difficult
to find quality writing like yours nowadays. I truly appreciate people like you!
Take care!!
You actually make it appear so easy together with your presentation but I find this matter to be really one thing which I
feel I might never understand. It sort of feels too complex and extremely broad for me.
I am taking a look ahead in your subsequent put up, I will attempt to get the hang of it!
Hey there would you mind sharing which blog platform you’re working with?
I’m going to start my own blog in the near future but I’m having a difficult time selecting between BlogEngine/Wordpress/B2evolution and Drupal.
The reason I ask is because your layout seems different then most blogs and
I’m looking for something unique.
P.S Apologies for getting off-topic but I had to ask!
Hi there! Do you know if they make any plugins to help with Search Engine Optimization? I’m trying
to get my blog to rank for some targeted keywords but I’m not seeing very good success.
If you know of any please share. Appreciate it!
Appreciate the recommendation. Let me try it out.
I love what you guys tend to be up too. Such clever work and reporting!
Keep up the very good works guys I’ve included you guys to my personal blogroll.
Excellent blog post. I certainly love this website. Keep it up!
whoah this blog is fantastic i really like studying your articles.
Stay up the good work! You know, many individuals are searching round for this info,
you can help them greatly.
What’s Happening i’m new to this, I stumbled upon this I’ve
found It absolutely helpful and it has helped
me out loads. I am hoping to give a contribution & assist other users like its aided me.
Good job.
Hello, I do believe your web site could possibly be having internet browser compatibility issues.
When I take a look at your web site in Safari, it looks fine however, if opening in IE, it has some overlapping issues.
I merely wanted to give you a quick heads up!
Aside from that, fantastic website!
Hello! I know this is kind of off topic but I was wondering which
blog platform are you using for this website? I’m getting tired of WordPress because I’ve had problems
with hackers and I’m looking at options for another platform.
I would be great if you could point me in the direction of a good platform.
First of all I want to say superb blog! I had a quick question that
I’d like to ask if you don’t mind. I was curious to find out how you center
yourself and clear your head before writing. I have had difficulty clearing my mind
in getting my thoughts out. I truly do enjoy writing however it just seems like the
first 10 to 15 minutes tend to be wasted just trying to figure out how to begin. Any recommendations or tips?
Many thanks!
Hi there would you mind stating which blog platform you’re working with?
I’m planning to start my own blog in the near future but I’m
having a difficult time deciding between BlogEngine/Wordpress/B2evolution and Drupal.
The reason I ask is because your design seems different then most blogs
and I’m looking for something unique. P.S My apologies for getting off-topic but I had to ask!
Hi there! I just would like to offer you a huge thumbs up for the great info you have got right here on this post.
I am returning to your site for more soon.
After checking out a number of the articles on your blog, I seriously appreciate your technique of
writing a blog. I added it to my bookmark site list and will be checking back
in the near future. Take a look at my website too and tell me how you feel.
What’s up, after reading this amazing piece of writing i am too
cheerful to share my know-how here with mates.
I’ve been exploring for a little bit for any high
quality articles or blog posts on this kind of house . Exploring in Yahoo I finally stumbled upon this website.
Studying this information So i am happy to express that I have an incredibly good uncanny feeling I found out exactly what I needed.
I so much certainly will make sure to do not disregard this site and give it a look on a continuing
basis.
With havin so much content and articles do you ever run into any issues of plagorism
or copyright infringement? My blog has a lot of unique content I’ve either authored myself or outsourced but it looks like
a lot of it is popping it up all over the internet without my permission. Do you know any ways to
help reduce content from being stolen? I’d really
appreciate it.
Thanks in favor of sharing such a pleasant thought, piece of writing
is pleasant, thats why i have read it entirely
Hello there! This is kind of off topic but I need some advice
from an established blog. Is it difficult to set
up your own blog? I’m not very techincal but I can figure things out
pretty quick. I’m thinking about making my own but I’m not sure where to start.
Do you have any points or suggestions? Thanks
I like the helpful information you provide to your
articles. I’ll bookmark your blog and test again here frequently.
I’m reasonably certain I will be told many new stuff proper here!
Best of luck for the following!
excellent points altogether, you just gained a emblem new reader.
What could you recommend about your post that you simply made a few days ago?
Any sure?
I’m not sure exactly why but this weblog is loading extremely slow
for me. Is anyone else having this issue or is it a problem on my end?
I’ll check back later on and see if the problem still exists.
When someone writes an paragraph he/she keeps the image of a user in his/her mind that
how a user can understand it. Therefore that’s why this paragraph is great.
Thanks!
After going over a few of the articles on your web site, I
truly like your technique of blogging. I added it to my bookmark website
list and will be checking back soon. Please check out my web site too and tell me
what you think.
I am regular reader, how are you everybody? This piece of writing posted at this web page is genuinely pleasant.
Very good write-up. I certainly love this website.
Keep writing!
Thanks for every other informative blog. Where else may I am getting that kind
of info written in such a perfect means? I’ve a venture that I am just now operating on, and
I’ve been at the glance out for such information.
Hello! I could have sworn I’ve visited this web site
before but after browsing through many of the articles I realized it’s new to
me. Anyhow, I’m definitely happy I stumbled upon it and I’ll be bookmarking it and checking back frequently!
What’s up all, here every person is sharing such know-how, therefore it’s fastidious to read this
webpage, and I used to pay a quick visit this website every day.
Excellent post. I will be dealing with some of these issues as well..
Awesome! Its genuinely amazing piece of writing, I have got much
clear idea regarding from this article.
I think this is one of the such a lot significant
info for me. And i am satisfied reading your article. However wanna statement on some common issues, The site style is wonderful,
the articles is really nice : D. Excellent job,
cheers
Hey I am so excited I found your webpage, I really found you by accident, while I
was researching on Yahoo for something else, Regardless I am here now and would just like
to say thanks a lot for a marvelous post and a all round enjoyable
blog (I also love the theme/design), I don’t have time to read through it all at the minute
but I have bookmarked it and also included your RSS feeds, so when I have time I will be back to
read more, Please do keep up the great job.
This article is truly a fastidious one it assists new web people, who are wishing in favor of blogging.
I savor, result in I found exactly what I was having a look for.
You’ve ended my four day long hunt! God Bless you man. Have
a nice day. Bye
Excellent beat ! I would like to apprentice while you amend your website, how
can i subscribe for a blog website? The account aided me a acceptable deal.
I had been tiny bit acquainted of this your broadcast
offered bright clear idea
I was wondering if you ever thought of changing the page layout of your website?
Its very well written; I love what youve got to say.
But maybe you could a little more in the way of content so
people could connect with it better. Youve got an awful lot
of text for only having 1 or 2 images. Maybe you could space it
out better?
Great post. I was checking constantly this blog and I’m impressed!
Very helpful info specially the last part 🙂 I care for such
info a lot. I was seeking this particular info for a long time.
Thank you and best of luck.
You actually make it appear so easy with your presentation but I
in finding this topic to be really one thing that I feel I might never understand.
It sort of feels too complicated and very broad for me.
I am taking a look ahead in your subsequent
post, I’ll attempt to get the dangle of it!
hi!,I really like your writing so so much!
proportion we keep up a correspondence more approximately your article on AOL?
I require an expert on this space to solve my problem.
Maybe that is you! Taking a look ahead to see you.
I’ve been surfing online more than 4 hours today, yet I never found any
interesting article like yours. It is pretty worth enough for me.
In my opinion, if all webmasters and bloggers made good
content as you did, the internet will be a lot
more useful than ever before.
Very quickly this web site will be famous
amid all blogging people, due to it’s fastidious posts
My brother recommended I might like this website. He was entirely right.
This post actually made my day. You can not imagine just how
much time I had spent for this info! Thanks!
You could certainly see your skills within the work you write.
The arena hopes for more passionate writers such as you who aren’t afraid to say how they believe.
All the time follow your heart.
Hi there would you mind stating which blog platform you’re working with?
I’m planning to start my own blog soon but I’m having a tough time
deciding between BlogEngine/Wordpress/B2evolution and Drupal.
The reason I ask is because your design seems different
then most blogs and I’m looking for something completely unique.
P.S Apologies for getting off-topic but I had to ask!
My brother suggested I might like this web site.
He was totally right. This post truly made my day. You can not imagine simply how much time I had spent for this information! Thanks!
Having read this I believed it was rather informative.
I appreciate you spending some time and energy to put
this content together. I once again find myself spending a significant amount of
time both reading and posting comments. But so what, it was still worth
it!
These are really impressive ideas in regarding blogging.
You have touched some fastidious things here. Any way
keep up wrinting.
Hi there to all, it’s truly a nice for me to visit this
web site, it consists of important Information.
No matter if some one searches for his necessary thing, so he/she needs
to be available that in detail, so that thing is maintained over
here.
Hello my loved one! I wish to say that this post is awesome, nice
written and come with almost all important infos. I would like to
see extra posts like this .
I am regular visitor, how are you everybody?
This piece of writing posted at this web
site is really nice.
It is not my first time to pay a visit this site,
i am visiting this website dailly and take nice information from
here every day.
Thank you for the auspicious writeup. It in fact was a amusement account it.
Look advanced to more added agreeable from you! However,
how can we communicate?
Great post. I was checking constantly this weblog and I’m inspired!
Extremely helpful info specially the last section 🙂 I
maintain such information a lot. I was looking for
this certain info for a long time. Thanks and best of luck.
Definitely consider that which you stated. Your favourite justification seemed to be at the net the easiest factor
to have in mind of. I say to you, I certainly get annoyed even as other people consider concerns that they plainly do
not recognize about. You controlled to hit the nail upon the top
and also outlined out the whole thing without having side-effects , other folks could
take a signal. Will likely be back to get more. Thanks
Hi there, just became aware of your blog through Google,
and found that it is really informative. I’m gonna watch out for brussels.
I will appreciate if you continue this in future. Many people
will be benefited from your writing. Cheers!
Thank you for sharing your thoughts. I really appreciate your efforts and I will be waiting for your further post
thanks once again.
Hi, i believe that i noticed you visited my weblog so i got here to return the
choose?.I’m attempting to in finding things to improve my web site!I suppose its ok to use some of
your ideas!!
This design is steller! You most certainly know how to
keep a reader entertained. Between your wit and your videos, I was almost moved
to start my own blog (well, almost…HaHa!) Wonderful
job. I really loved what you had to say, and more than that, how you presented it.
Too cool!
I’m curious to find out what blog platform you happen to be working with?
I’m having some minor security problems with my latest website and I’d like to
find something more risk-free. Do you have any suggestions?
This design is spectacular! You most certainly know how to keep a reader amused.
Between your wit and your videos, I was almost moved
to start my own blog (well, almost…HaHa!) Fantastic job.
I really loved what you had to say, and
more than that, how you presented it. Too cool!
What’s Happening i’m new to this, I stumbled upon this I have discovered It
absolutely useful and it has aided me out loads.
I hope to give a contribution & help other
users like its aided me. Great job.
It’s actually a cool and helpful piece of info. I’m satisfied that
you shared this helpful info with us. Please stay us informed like this.
Thank you for sharing.
Wow, awesome blog layout! How long have you been blogging for?
you made blogging look easy. The overall look of
your website is fantastic, as well as the content!
Amazing! This blog looks exactly like my old one! It’s on a entirely different topic but it has pretty
much the same layout and design. Excellent
choice of colors!
Ahaa, its pleasant conversation concerning this post at this place at this web site,
I have read all that, so at this time me also commenting
here.
It’s appropriate time to make some plans for the future and it is time to be happy.
I’ve read this put up and if I may I want to recommend you few attention-grabbing issues or tips.
Maybe you can write next articles relating to this article.
I desire to read more things approximately it!
Everything said was very logical. But, think about this, what if you typed
a catchier title? I ain’t saying your information is not good., but suppose you added a headline to maybe get
a person’s attention? I mean Follow Our Garage Door Routine Maintenance Tips is kinda vanilla.
You should look at Yahoo’s home page and see how they
write post titles to grab viewers interested. You
might add a video or a related picture or two to get people excited about what you’ve
got to say. In my opinion, it could make your posts a little bit more interesting.
Magnificent goods from you, man. I have understand your stuff previous to and you’re just extremely excellent.
I actually like what you’ve acquired here, really like what you’re stating and the way
in which you say it. You make it entertaining and you still care for to keep it sensible.
I can not wait to read much more from you.
This is actually a terrific web site.
I have been exploring for a bit for any high quality articles
or blog posts on this kind of space . Exploring in Yahoo I eventually stumbled upon this web site.
Studying this information So i am glad to show that I’ve an incredibly excellent uncanny
feeling I discovered just what I needed. I such a lot indisputably will make sure to do
not omit this site and give it a glance regularly.
Your style is unique in comparison to other folks I have read stuff from.
Thanks for posting when you have the opportunity, Guess I will just book mark this
page.
Hello would you mind letting me know which web
host you’re working with? I’ve loaded your blog in 3 different internet browsers and I must say this blog loads a lot faster
then most. Can you suggest a good web hosting provider at
a fair price? Many thanks, I appreciate it!
Hi, i read your blog occasionally and i own a similar
one and i was just wondering if you get a lot of spam comments?
If so how do you protect against it, any plugin or anything you can recommend?
I get so much lately it’s driving me crazy so any help is very much
appreciated.
I don’t know if it’s just me or if perhaps everybody else encountering
issues with your site. It appears as though some of the
written text within your content are running off the screen. Can someone else please provide feedback
and let me know if this is happening to them too?
This might be a problem with my internet browser because
I’ve had this happen previously. Many thanks
Hi there, just became aware of your blog through Google, and found that it is really informative.
I am going to watch out for brussels. I will appreciate if you
continue this in future. A lot of people will be benefited from
your writing. Cheers!
If some one wishes to be updated with most up-to-date technologies afterward he must be pay a quick visit this website and be up to
date all the time.
I savour, lead to I found just what I was having a look for.
You’ve ended my 4 day lengthy hunt! God Bless you man. Have a great day.
Bye
Hello, I check your blog on a regular basis.
Your story-telling style is witty, keep up the good work!
Hi there, yup this article is really good and I have learned lot of things from
it regarding blogging. thanks.
Very rapidly this website will be famous among all blog visitors, due to it’s pleasant articles
Everything is very open with a really clear explanation of the challenges.
It was truly informative. Your site is extremely helpful.
Many thanks for sharing!
Whoa! This blog looks exactly like my old one! It’s on a
entirely different subject but it has pretty much the same page layout and design. Wonderful choice of colors!
Hello there, I found your website by means of Google whilst looking for a similar topic, your website got here
up, it seems to be good. I have bookmarked it in my google bookmarks.
Hello there, simply was alert to your blog via Google, and located that it is truly informative.
I’m gonna be careful for brussels. I’ll appreciate when you continue this in future.
A lot of other people will be benefited out of your
writing. Cheers!
Hi there, I discovered your web site via Google at the same time as searching for a similar matter, your website got here up, it seems
great. I’ve bookmarked it in my google bookmarks.
Hi there, simply turned into alert to your weblog through
Google, and located that it is truly informative. I am going to be careful for brussels.
I’ll appreciate for those who continue this in future.
Lots of people shall be benefited from your writing. Cheers!
Thanks for sharing your thoughts on Pink Salt Trick.
Regards
Someone necessarily lend a hand to make critically posts I might state.
This is the very first time I frequented your web page and to this point?
I amazed with the research you made to create
this actual publish amazing. Magnificent
activity!
What i do not understood is actually how you’re now not really
much more smartly-favored than you may be now.
You’re very intelligent. You understand thus significantly on the subject of this
subject, produced me for my part consider it from numerous varied angles.
Its like men and women aren’t interested until
it’s something to accomplish with Lady gaga! Your personal stuffs outstanding.
All the time handle it up!
Hello, after reading this remarkable piece of writing i am as well cheerful to share my experience
here with mates.
Heya superb blog! Does running a blog similar to this take a lot
of work? I have no expertise in programming but I was hoping to
start my own blog soon. Anyways, if you have any suggestions or techniques for new blog owners please
share. I understand this is off subject nevertheless I simply needed to ask.
Kudos!
Hello my family member! I want to say that this article
is amazing, nice written and come with approximately all significant infos.
I’d like to look more posts like this .
I savour, cause I found exactly what I was looking for.
You’ve ended my 4 day long hunt! God Bless you man. Have a nice day.
Bye
Wonderful article! That is the type of information that should be
shared across the internet. Shame on Google for now not positioning
this post upper! Come on over and seek advice from my web site .
Thank you =)
Spot on with this write-up, I honestly believe that this web site needs a great deal more attention. I’ll probably be back again to read more, thanks for the information!
It’s going to be finish of mine day, however before end I am reading this enormous post to improve my experience.
What a data of un-ambiguity and preserveness of precious know-how about unexpected emotions.
I will right away grab your rss as I can not find
your email subscription link or e-newsletter service.
Do you have any? Please let me recognise in order that I may subscribe.
Thanks.
A fascinating discussion is worth comment. I do believe that
you need to write more on this subject matter, it may not be a taboo subject but
usually folks don’t speak about these subjects. To the
next! Kind regards!!
This piece of writing provides clear idea in support of the new visitors of blogging, that in fact how to do
blogging and site-building.
Hello! Do you know if they make any plugins to protect against hackers?
I’m kinda paranoid about losing everything I’ve worked hard
on. Any recommendations?
After I initially commented I seem to have clicked the -Notify me when new comments are added-
checkbox and from now on whenever a comment is added I get four emails with the same comment.
There has to be an easy method you are able to remove me from that
service? Appreciate it!
I read this paragraph fully about the difference of latest and earlier technologies, it’s amazing
article.
I have learn some good stuff here. Definitely price bookmarking for revisiting.
I wonder how much effort you set to create any such fantastic informative web site.
I know this if off topic but I’m looking into starting
my own blog and was wondering what all is needed to get setup?
I’m assuming having a blog like yours would cost a pretty penny?
I’m not very internet savvy so I’m not 100% sure.
Any suggestions or advice would be greatly appreciated. Cheers
Your way of telling all in this piece of writing is really nice,
every one can simply understand it, Thanks a lot.
Fine way of explaining, and nice article to obtain facts
regarding my presentation subject, which i am going
to present in college.
Nice post. I learn something new and challenging on sites I stumbleupon on a daily
basis. It’s always exciting to read content from
other authors and practice something from their sites.
Neat blog! Is your theme custom made or did you download it
from somewhere? A design like yours with a few simple tweeks would really
make my blog stand out. Please let me know where you
got your design. Thank you
Very nice post. I simply stumbled upon your weblog
and wished to mention that I have really enjoyed browsing your blog posts.
After all I’ll be subscribing on your feed and I hope you
write again very soon!
Yes! Finally someone writes about https://www.biz-development.com.
Hey there exceptional website! Does running a blog like this take a
large amount of work? I have very little knowledge of coding but I was hoping
to start my own blog in the near future. Anyway, should you have any ideas or techniques for
new blog owners please share. I understand this is off
subject however I just needed to ask. Thanks!
Wow that was odd. I just wrote an really long comment but after I
clicked submit my comment didn’t appear. Grrrr…
well I’m not writing all that over again. Regardless,
just wanted to say fantastic blog!
It’s remarkable to pay a quick visit this web page
and reading the views of all friends concerning this
post, while I am also keen of getting knowledge.
Thanks for finally writing about > Follow Our Garage Door Routine Maintenance Tips < Loved it!
I’ll right away seize your rss as I can’t find your email subscription link or e-newsletter service.
Do you’ve any? Kindly let me know in order that I may subscribe.
Thanks.
Very rapidly this website will be famous among all blogging and site-building users, due to it’s nice articles
I every time used to study piece of writing in news papers but now as I am a user of internet
therefore from now I am using net for posts, thanks to web.
Its like you learn my thoughts! You seem to know so
much approximately this, like you wrote the
e book in it or something. I feel that you could
do with a few p.c. to pressure the message home a little bit, but instead of that,
this is wonderful blog. A great read. I will definitely be back.
Hello friends, its great paragraph on the topic of tutoringand completely explained, keep it up all the time.
excellent post, very informative. I ponder why the other specialists of this sector do not notice this.
You should continue your writing. I am sure, you’ve a great
readers’ base already!
I read this piece of writing completely on the topic of the comparison of latest
and preceding technologies, it’s amazing article.
Hello There. I found your blog the usage of msn. That is an extremely neatly written article.
I will be sure to bookmark it and return to learn extra of
your useful information. Thanks for the post. I will definitely
return.
It’s actually a nice and useful piece of information. I’m glad that you simply shared this helpful information with us.
Please keep us informed like this. Thanks for sharing.
Hello colleagues, how is everything, and what you want to
say about this post, in my view its really remarkable for me.
It’s a pity you don’t have a donate button! I’d most
certainly donate to this brilliant blog! I guess for now i’ll settle for bookmarking and
adding your RSS feed to my Google account. I look
forward to brand new updates and will share this blog with my
Facebook group. Chat soon!
Tremendous things here. I’m very satisfied to look your post.
Thanks a lot and I am taking a look forward to touch you.
Will you please drop me a mail?
Hello There. I found your blog using msn. This is a
very well written article. I will be sure to bookmark it and return to read
more of your useful information. Thanks for the post. I will definitely return.
When some one searches for his necessary thing, therefore he/she
needs to be available that in detail, thus that thing is maintained over here.
Hey! Do you know if they make any plugins to safeguard against hackers?
I’m kinda paranoid about losing everything I’ve worked hard on. Any
tips?
I am not certain the place you’re getting your information,
however good topic. I must spend some time finding out much more or figuring out more.
Thank you for fantastic info I was in search of this info for my mission.
Hey I know this is off topic but I was wondering if you knew of any widgets I could add to my
blog that automatically tweet my newest twitter updates.
I’ve been looking for a plug-in like this for quite some time
and was hoping maybe you would have some experience
with something like this. Please let me know if you run into anything.
I truly enjoy reading your blog and I look forward to your new updates.
Hi friends, its wonderful piece of writing concerning cultureand completely explained, keep
it up all the time.
Hi! Would you mind if I share your blog with my twitter group?
There’s a lot of folks that I think would really enjoy your content.
Please let me know. Many thanks
Nice post. I was checking constantly this blog and
I am impressed! Extremely helpful information specially the last part 🙂 I care
for such information much. I was looking for this certain information for a long time.
Thank you and good luck.
Wonderful items from you, man. I’ve be mindful your stuff previous to and you are just too excellent.
I actually like what you’ve received here, certainly like what you are stating and the way wherein you
are saying it. You make it entertaining and you continue to
care for to stay it sensible. I can’t wait to read far more from you.
That is actually a tremendous website.
Why people still use to read news papers when in this technological world all is existing on web?
I just like the valuable info you supply for your articles.
I’ll bookmark your blog and test again here frequently. I am quite certain I
will be told lots of new stuff right right here! Best of luck for the next!
I do not even know the way I ended up right here, however I assumed this put up
was once good. I do not realize who you’re but definitely you are going to a famous
blogger for those who aren’t already. Cheers!
Wow, superb blog layout! How long have you been blogging for?
you make blogging look easy. The overall look of your web site is great, let
alone the content!
I visited various websites except the audio feature for
audio songs current at this web site is truly superb.
Today, while I was at work, my sister stole my apple ipad and tested to see if it can survive a 30 foot drop, just
so she can be a youtube sensation. My iPad is now destroyed and she has 83 views.
I know this is totally off topic but I had to share it with someone!
Thank you for every other magnificent post.
The place else may anybody get that kind of information in such a
perfect method of writing? I’ve a presentation subsequent week, and I am
on the look for such info.
I like the valuable information you provide in your articles.
I will bookmark your blog and check again here regularly.
I am quite certain I will learn many new stuff right here!
Good luck for the next!
Pretty nice post. I just stumbled upon your weblog and wished to say that I’ve really enjoyed browsing your blog
posts. After all I will be subscribing to your rss feed and I hope you write again very soon!
Hey there just wanted to give you a quick heads up. The text in your post seem to be
running off the screen in Chrome. I’m not sure
if this is a format issue or something to do with web browser compatibility but I figured I’d post to let you know.
The style and design look great though! Hope you get the problem fixed soon. Thanks
Just want to say your article is as surprising.
The clarity in your post is just spectacular and i
could assume you are an expert on this subject.
Fine with your permission allow me to grab your RSS feed to keep up to date with forthcoming post.
Thanks a million and please keep up the enjoyable work.
I really like looking through an article that can make men and
women think. Also, many thanks for allowing for me to comment!
Thanks for sharing your thoughts about rjpwin slot.
Regards
Wow, amazing blog layout! How long have you been blogging for?
you make blogging look easy. The overall look
of your site is great, as well as the content!
It’s appropriate time to make some plans for the future and it’s time to be happy.
I’ve read this post and if I could I wish to suggest you few interesting things or suggestions.
Maybe you can write next articles referring to this article.
I want to read even more things about it!
I was recommended this blog by my cousin. I am not sure whether this post is written by him as nobody else know such
detailed about my problem. You’re wonderful! Thanks!
I like the valuable information you provide on your articles.
I will bookmark your blog and take a look at again right here regularly.
I am rather certain I will be told many new stuff right right here!
Best of luck for the next!
I’m not that much of a internet reader to be honest but your blogs
really nice, keep it up! I’ll go ahead and bookmark your site to come back in the future.
All the best
Good article. I absolutely appreciate this website.
Thanks!
This article presents clear idea for the new viewers of blogging, that in fact how to do running a blog.
My brother recommended I may like this web site. He was once totally right.
This put up actually made my day. You can not imagine simply how a lot time I
had spent for this information! Thank you!
Howdy just wanted to give you a quick heads up.
The words in your article seem to be running off the screen in Ie.
I’m not sure if this is a format issue or something to do with web
browser compatibility but I figured I’d post to let you know.
The design and style look great though! Hope you get the issue fixed soon. Cheers
You’re so interesting! I do not think I have read through
anything like this before. So great to find another person with a few unique thoughts
on this topic. Really.. thank you for starting this up. This
website is one thing that is required on the internet, someone with a little originality!
Thanks a bunch for sharing this with all folks you really
recognise what you’re speaking about! Bookmarked. Kindly additionally discuss with my website =).
We can have a hyperlink trade agreement between us
Hello there, I do believe your blog may be having browser compatibility problems.
When I look at your website in Safari, it looks fine but
when opening in I.E., it has some overlapping issues. I
merely wanted to provide you with a quick heads up!
Other than that, excellent website!
Good day! This is my 1st comment here so I just wanted to give a quick
shout out and tell you I truly enjoy reading through your articles.
Can you recommend any other blogs/websites/forums that cover the same topics?
Appreciate it!
Howdy would you mind letting me know which web
host you’re using? I’ve loaded your blog in 3 completely different web browsers and I must say this blog loads a lot faster then most.
Can you recommend a good internet hosting provider at a fair price?
Kudos, I appreciate it!
I do not know if it’s just me or if everybody else encountering problems with your website.
It appears as though some of the text in your content are running off
the screen. Can somebody else please comment and let me know if this is
happening to them as well? This could be a problem with
my web browser because I’ve had this happen before.
Kudos
Wow! In the end I got a website from where I be capable of truly
obtain useful information regarding my study and knowledge.
Wonderful blog! I found it while searching on Yahoo News.
Do you have any suggestions on how to get listed in Yahoo News?
I’ve been trying for a while but I never seem to get there!
Appreciate it
I visited several websites except the audio quality for audio songs present
at this site is genuinely marvelous.
Hey! Do you know if they make any plugins to protect against hackers?
I’m kinda paranoid about losing everything I’ve worked
hard on. Any tips?
I visited many blogs however the audio quality for audio songs
existing at this web page is actually superb.
For newest news you have to visit internet and on world-wide-web I found
this web site as a finest site for latest updates.
Appreciate the recommendation. Will try it out.
Wow, this piece of writing is pleasant, my sister is analyzing such
things, therefore I am going to convey her.
Superb post but I was wanting to know if you could write a litte more
on this subject? I’d be very thankful if you could elaborate a little bit more.
Cheers!
I relish, lead to I discovered exactly what I
used to be taking a look for. You have ended my four day
long hunt! God Bless you man. Have a nice day. Bye
Wow, this paragraph is nice, my younger sister is analyzing these things, therefore I am going to convey her.
A motivating discussion is worth comment. I believe that you should publish more about this topic, it might not be a taboo matter but usually folks
don’t talk about these topics. To the next! Kind
regards!!
Hello, I enjoy reading through your article post. I wanted to write a little comment to support you.
What’s up colleagues, its impressive post about teachingand fully explained,
keep it up all the time.
I love your blog.. very nice colors & theme. Did you design this website yourself
or did you hire someone to do it for you? Plz reply as I’m looking to
construct my own blog and would like to find
out where u got this from. appreciate it
Wonderful blog! Do you have any recommendations for aspiring writers?
I’m planning to start my own website soon but I’m a little lost on everything.
Would you propose starting with a free platform like WordPress or go for a paid option? There are
so many choices out there that I’m totally confused .. Any recommendations?
Cheers!
What’s up, this weekend is pleasant for me,
as this occasion i am reading this great educational paragraph here
at my house.
Link exchange is nothing else but it is simply placing the other person’s webpage link on your page
at proper place and other person will also do similar in support of
you.
Do you have a spam problem on this blog; I also am a blogger, and
I was wondering your situation; we have developed some nice procedures and we are
looking to trade techniques with others, why not shoot me an e-mail if interested.
Truly no matter if someone doesn’t understand after that its up to other
users that they will help, so here it takes place.
It’s amazing to visit this website and reading the views of all mates about this post, while I am also zealous of getting know-how.
Hey there! Quick question that’s entirely off topic. Do
you know how to make your site mobile friendly?
My blog looks weird when browsing from my iphone4.
I’m trying to find a theme or plugin that might be able to resolve this issue.
If you have any recommendations, please share. Appreciate it!
I was curious if you ever considered changing the page layout of your website?
Its very well written; I love what youve got to say.
But maybe you could a little more in the way of content so people could connect with it better.
Youve got an awful lot of text for only having
one or two pictures. Maybe you could space it out better?
a1garagedoor.ca
a1garagedoor.ca
Everyone loves what you guys are usually up too.
This sort of clever work and coverage! Keep up the
superb works guys I’ve included you guys to my blogroll.
You really make it seem so easy with your presentation but I find
this topic to be actually something which I think I would never understand.
It seems too complicated and extremely broad for me.
I’m looking forward for your next post, I’ll try to get the hang
of it!
For most recent news you have to pay a quick visit the web and
on internet I found this site as a best site for newest updates.
Thanks , I have just been looking for information approximately this topic for ages and yours is the best I have discovered till now.
But, what concerning the bottom line? Are you sure concerning the
source?
I’ve been exploring for a little bit for any high-quality articles or weblog posts in this sort of area .
Exploring in Yahoo I finally stumbled upon this site. Reading this information So i’m satisfied
to express that I have an incredibly excellent uncanny feeling I
found out exactly what I needed. I such a lot certainly will make certain to don?t omit this site and provides it a look on a constant
basis.
Excellent beat ! I would like to apprentice at the
same time as you amend your site, how could i subscribe for a blog website?
The account helped me a acceptable deal. I have been tiny bit familiar of
this your broadcast provided vivid clear concept
I pay a quick visit every day some web sites and information sites to read content, except this
webpage gives feature based posts.
It’s very simple to find out any topic on web as compared to books, as I found this
paragraph at this web site.
What’s up all, here every person is sharing such familiarity, so it’s good to read this web site, and I used to visit this webpage everyday.
Good post! We will be linking to this particularly great content on our website.
Keep up the great writing.
It is appropriate time to make some plans for the future and it
is time to be happy. I have read this post and if I could I
want to suggest you few interesting things or tips. Maybe you could write
next articles referring to this article. I want to read more things about it!
This website really has all of the information I needed concerning this subject and
didn’t know who to ask.
These are genuinely wonderful ideas in concerning blogging.
You have touched some fastidious points here. Any way keep up wrinting.
Oh my goodness! Impressive article dude! Thank you
so much, However I am experiencing troubles with
your RSS. I don’t know why I cannot join it. Is there anyone else
getting identical RSS problems? Anyone who knows the solution can you
kindly respond? Thanx!!
This design is wicked! You most certainly know how to keep a reader amused.
Between your wit and your videos, I was almost moved to start my
own blog (well, almost…HaHa!) Fantastic job. I
really loved what you had to say, and more than that,
how you presented it. Too cool!
When I initially commented I clicked the “Notify me when new comments are added”
checkbox and now each time a comment is added I get three
emails with the same comment. Is there any way you can remove me from that service?
Cheers!
Hello i am kavin, its my first occasion to commenting anywhere, when i read this paragraph i thought i could also create
comment due to this brilliant article.
I love what you guys tend to be up too. This sort of clever work and
reporting! Keep up the very good works guys I’ve included
you guys to blogroll.
We’re a group of volunteers and opening a new
scheme in our community. Your site offered us with valuable
info to work on. You have done a formidable job and our entire community will
be thankful to you.
My partner and I stumbled over here different web address and thought I might as well check things out.
I like what I see so i am just following you. Look forward to checking out your web page again.
This is my first time pay a visit at here and i am genuinely pleassant
to read everthing at one place.
Thanks for your personal marvelous posting! I truly enjoyed reading it, you happen to be a great author.
I will be sure to bookmark your blog and will eventually come back from
now on. I want to encourage one to continue your great job,
have a nice afternoon!
Good day I am so thrilled I found your blog page, I really found you
by error, while I was looking on Digg for something else, Nonetheless I
am here now and would just like to say thanks a lot for a marvelous
post and a all round thrilling blog (I also love the theme/design), I don’t have time to go through it all at the
minute but I have bookmarked it and also added your RSS feeds, so when I have time I will be back to
read a lot more, Please do keep up the awesome work.
always i used to read smaller content which also
clear their motive, and that is also happening with this post which I am reading here.
Hello there! This article could not be written much better!
Looking at this post reminds me of my previous roommate!
He constantly kept preaching about this. I will send this post to him.
Fairly certain he’ll have a great read. I appreciate you for
sharing!
Heya i’m for the primary time here. I came across this board and I to find It really
useful & it helped me out much. I am hoping to present one thing again and aid others like
you helped me.